MODULAR CAD SCREEN
DES 50 class at UC Davis, California
F A L L 2 0 2 0
WHAT’S MODULAR design?
Modular design is the technique of using standardized units to build together a singular standing piece or full artwork. Using standardized units to create a singular standing piece, modular design to me is like Legos, Minecraft, or building blocks to make a finished tessellated pattern or design. The kind of modular screen students brainstormed was one that had uniqueness, complex aesthetics, and stability in mind.
-
To marry both urban architectural aesthetics and natural lighting/atmosphere. It was important to me how natural lighting was cast on the screen and the kind of pattern the shadow created, which was pixelated and fragmented, the theme of the screen.
-
Clientele looking for modern exterior design. For this project I aimed for making a bridge for a park in an urban setting. An area where tech or other innovative companies nearby would most likely appreciate this kind of architectural design.
-
Photoshop/Illustrator, SketchUp
BRAINSTORMING PHASE:
There were 3 rounds in the brainstorming phase, and 5 steps in the developmental stage. Rather than working directly with our digital tools, my professor told us to work with our hands first. We worked with simple materials—construction and parchment paper, toothpicks, and tape and had a set number of random themes to come up with each form. What was important in the first step of brainstorming was not to think too hard, so I timed myself to do about a minute per each module. These first three rounds had students think about a general idea for their modular design.
What works and what doesn’t? What type of themes and what kind of shapes was most interesting?
For steps 1-3, we worked with a small grid that we could alter by folding, cutting and taping. Step four took from modules 1-3, and the themes were pixelated + fragmented and fragmented + radiating. This was useful when moving to the fourth step, which was finding a way to make a tessellation. Keep in mind from what angle the next tessellation shape could form from, and if it had structural integrity.


3D MODEL AND 2D BLUEPRINT
-

irl model
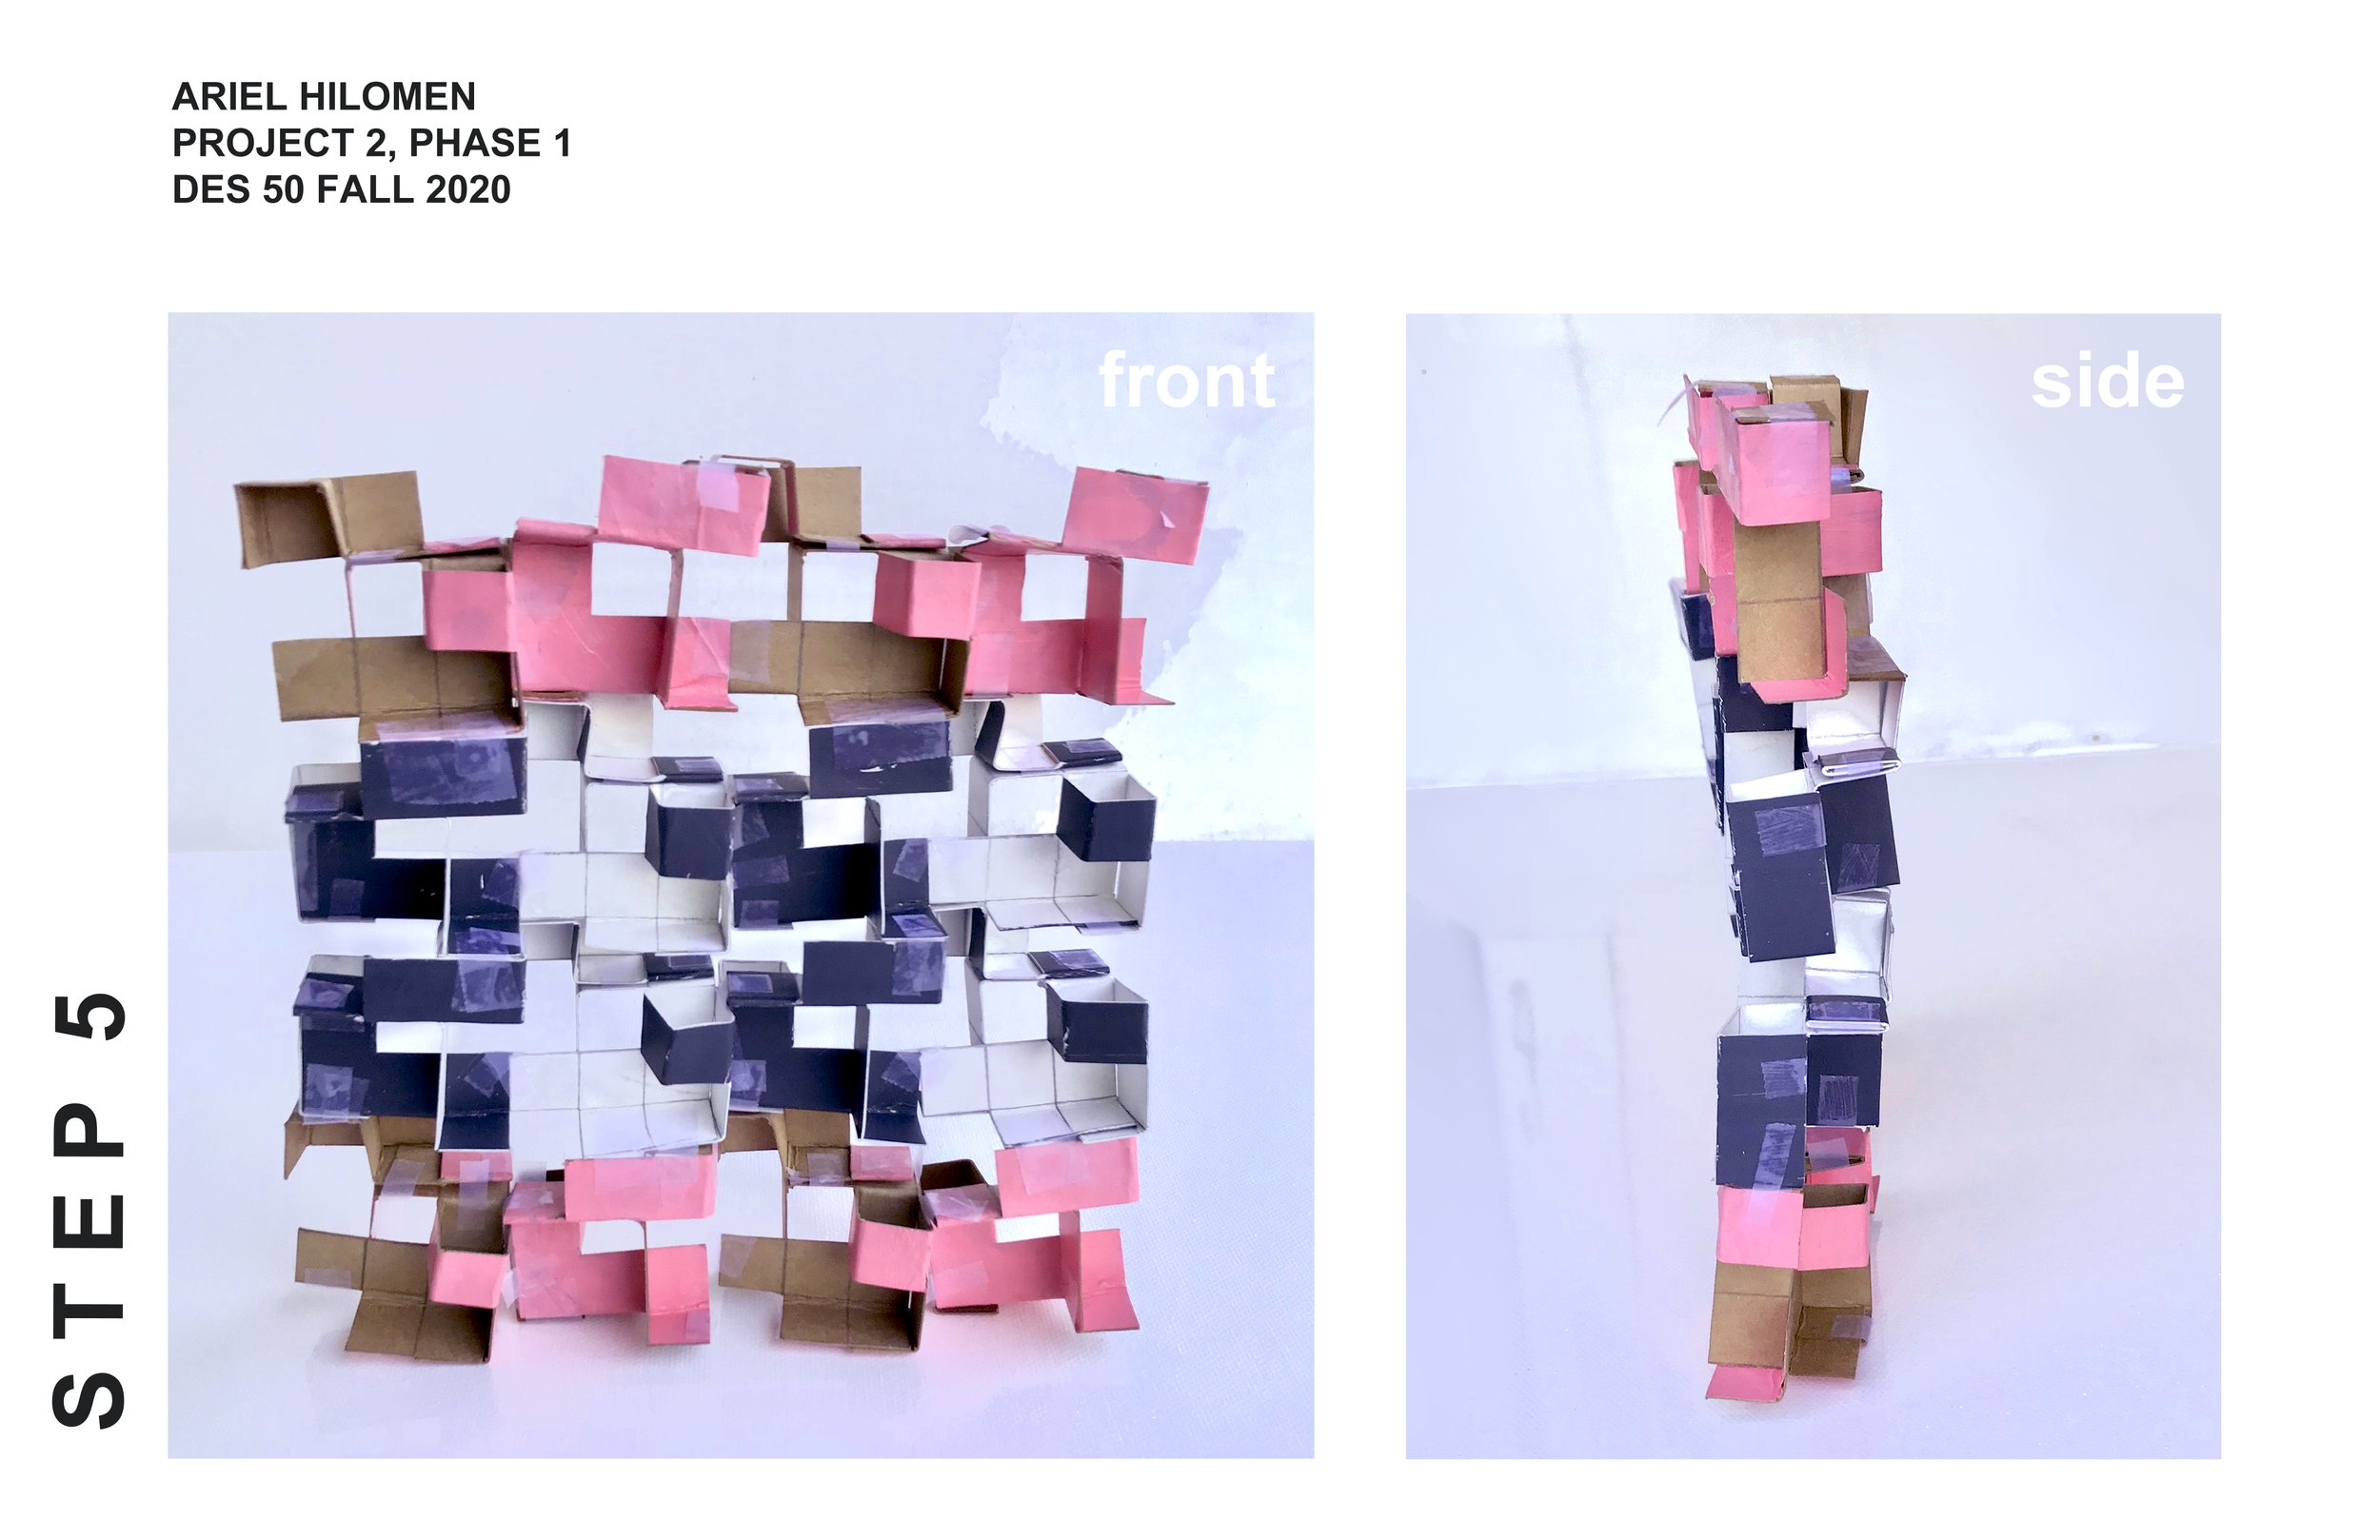
In Step 5, we took the concept of pixelated and fragmented and turned it into a practice modular screen to test its stability. The most difficult part of this project was the technical aspect; the parameters of the screen were that it had to be 2 blocks (1 block/square = 1 sq. inch) thin and about 20in x 20in in both width and height.
-

blueprint plan
This blueprint plan more accurately demonstrates what the modular screen would look like if it had to be constructed from scratch. The plan shows how to make a singular module and what it would look like when compiled together. I think the plans are a little confusing when trying to find out where to join the modules together, because the only marker is the small visual of the tape holding each one together.

